How to install Fontana Brushed Nickel Wall Mount Commercial Automatic Sensor Faucet With Insight Infrared Technology | FS1091-BN
Easy step by steps installation instructions for Sensor Faucet
|
|
Visit Product Page 
|
|
- Before you begin, please read the installation instructions below. Observe all local building and safety codes.
- Unpack and inspect the products for any shipping damages. If you find damages, do not install.
- Please note all products must be installed by a professional and certified plumber otherwise warranty might be voided.
|
sensor
|
|
|
Sensor Faucet Installations Instructions
Specifications- Self Contained Design
- Cupc,Wras,Nsf,Watermark,Ce
|
Electrical Sensor Kitchen Sink Basin Tap- Self Contained Design
- Ceramic Mixing Valve Built-In
- Wall Mount Design One Piece Infrared Sensor Basin Faucet
- The Sensor Is Self-Adjusting To Its Installation Environment When Wired In
- Mains And Battery Powered Options Included
- Solid Brass Construction
- Hygienic And Water Conservation
|
Technical Information| Power Supply | DC:6V(4 X AA Alkaline Batteries)
AC:220V-240V/50Hz Or AC110V/60Hz | | Power Consumption | Static≤0.3mW;Active≤3W | | Battery Life | 108000 Flushes(4 X AA Alkaline Batteries) | | Sensor Field | 5-30cm (Adjustable) | | Water Pressure | 0.05~0.8MPa | | Ambient Temperature | 0~55°C | | Working Life | 350000~400000 Times | | Sensor Time | <1 Sec | | Closing Time | <2 Sec | | Low Voltage Indication | 3.9V(The Light Will Flash Twice Each Two Seconds) | | Self Shut Off Time | 65-70 Sec (Non Stop Flushing) |
|
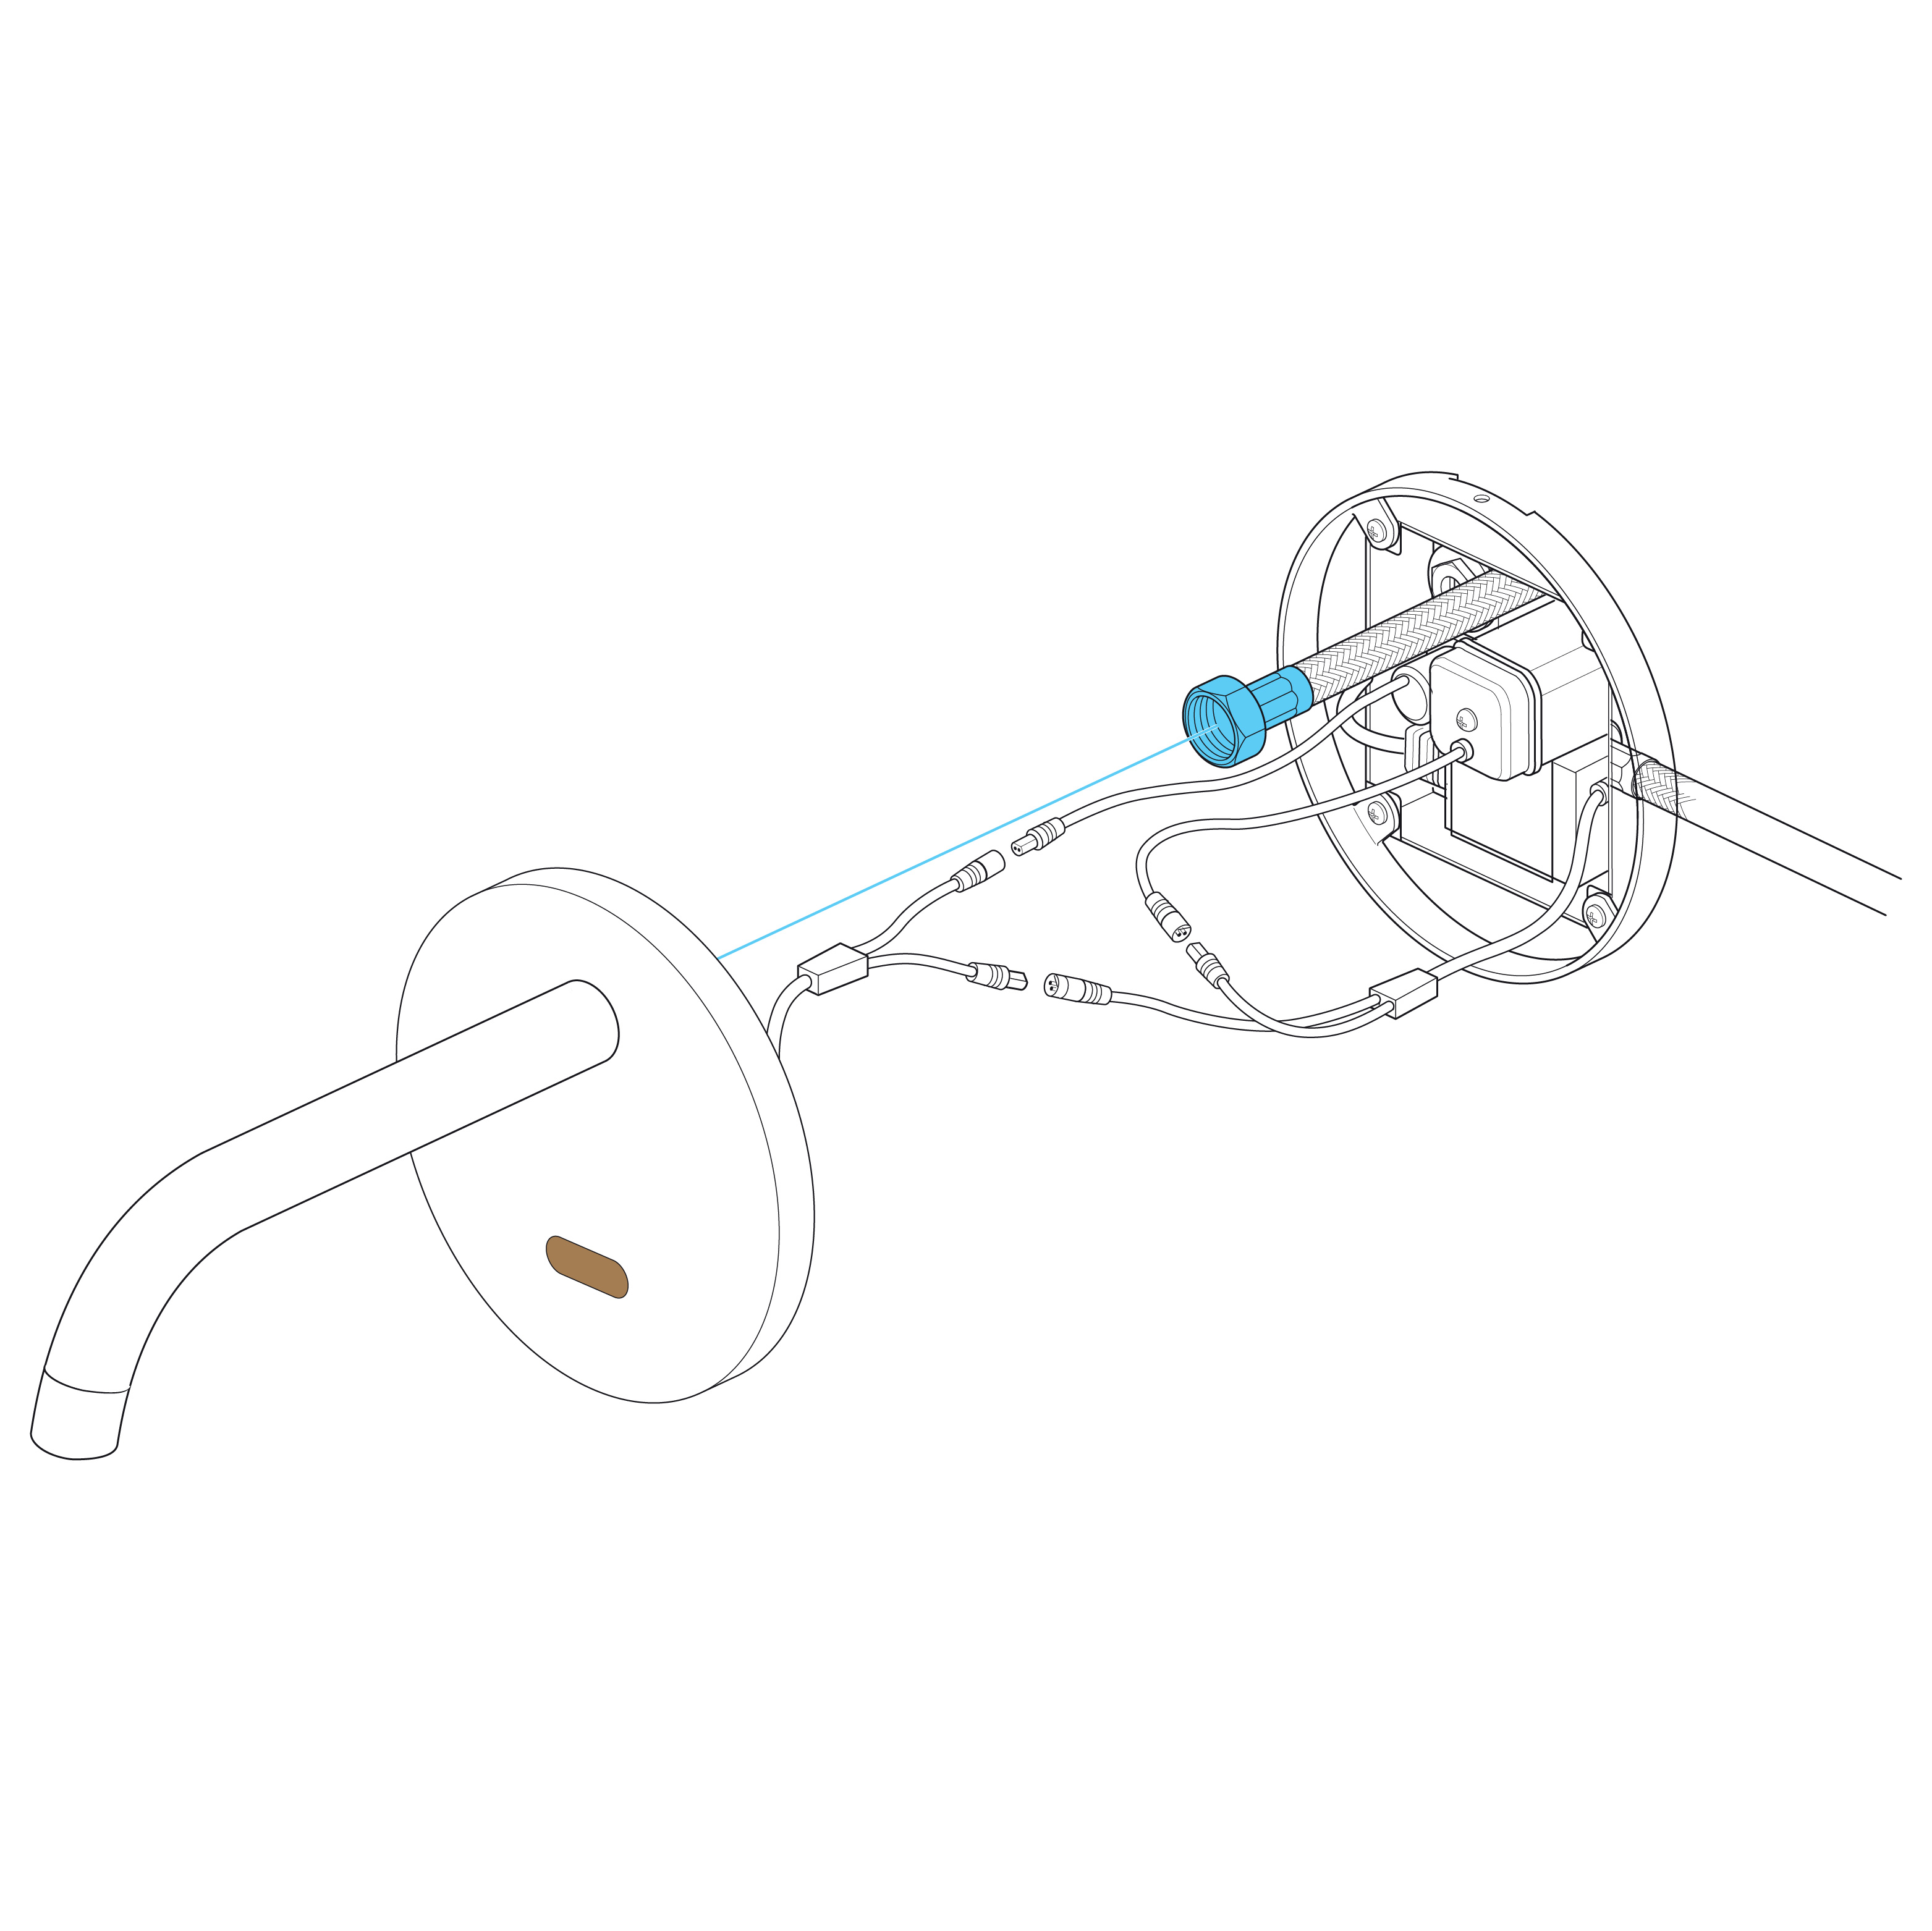
For ease of installation, the faceplate and battery can be disconnected from the unit at the connectors.
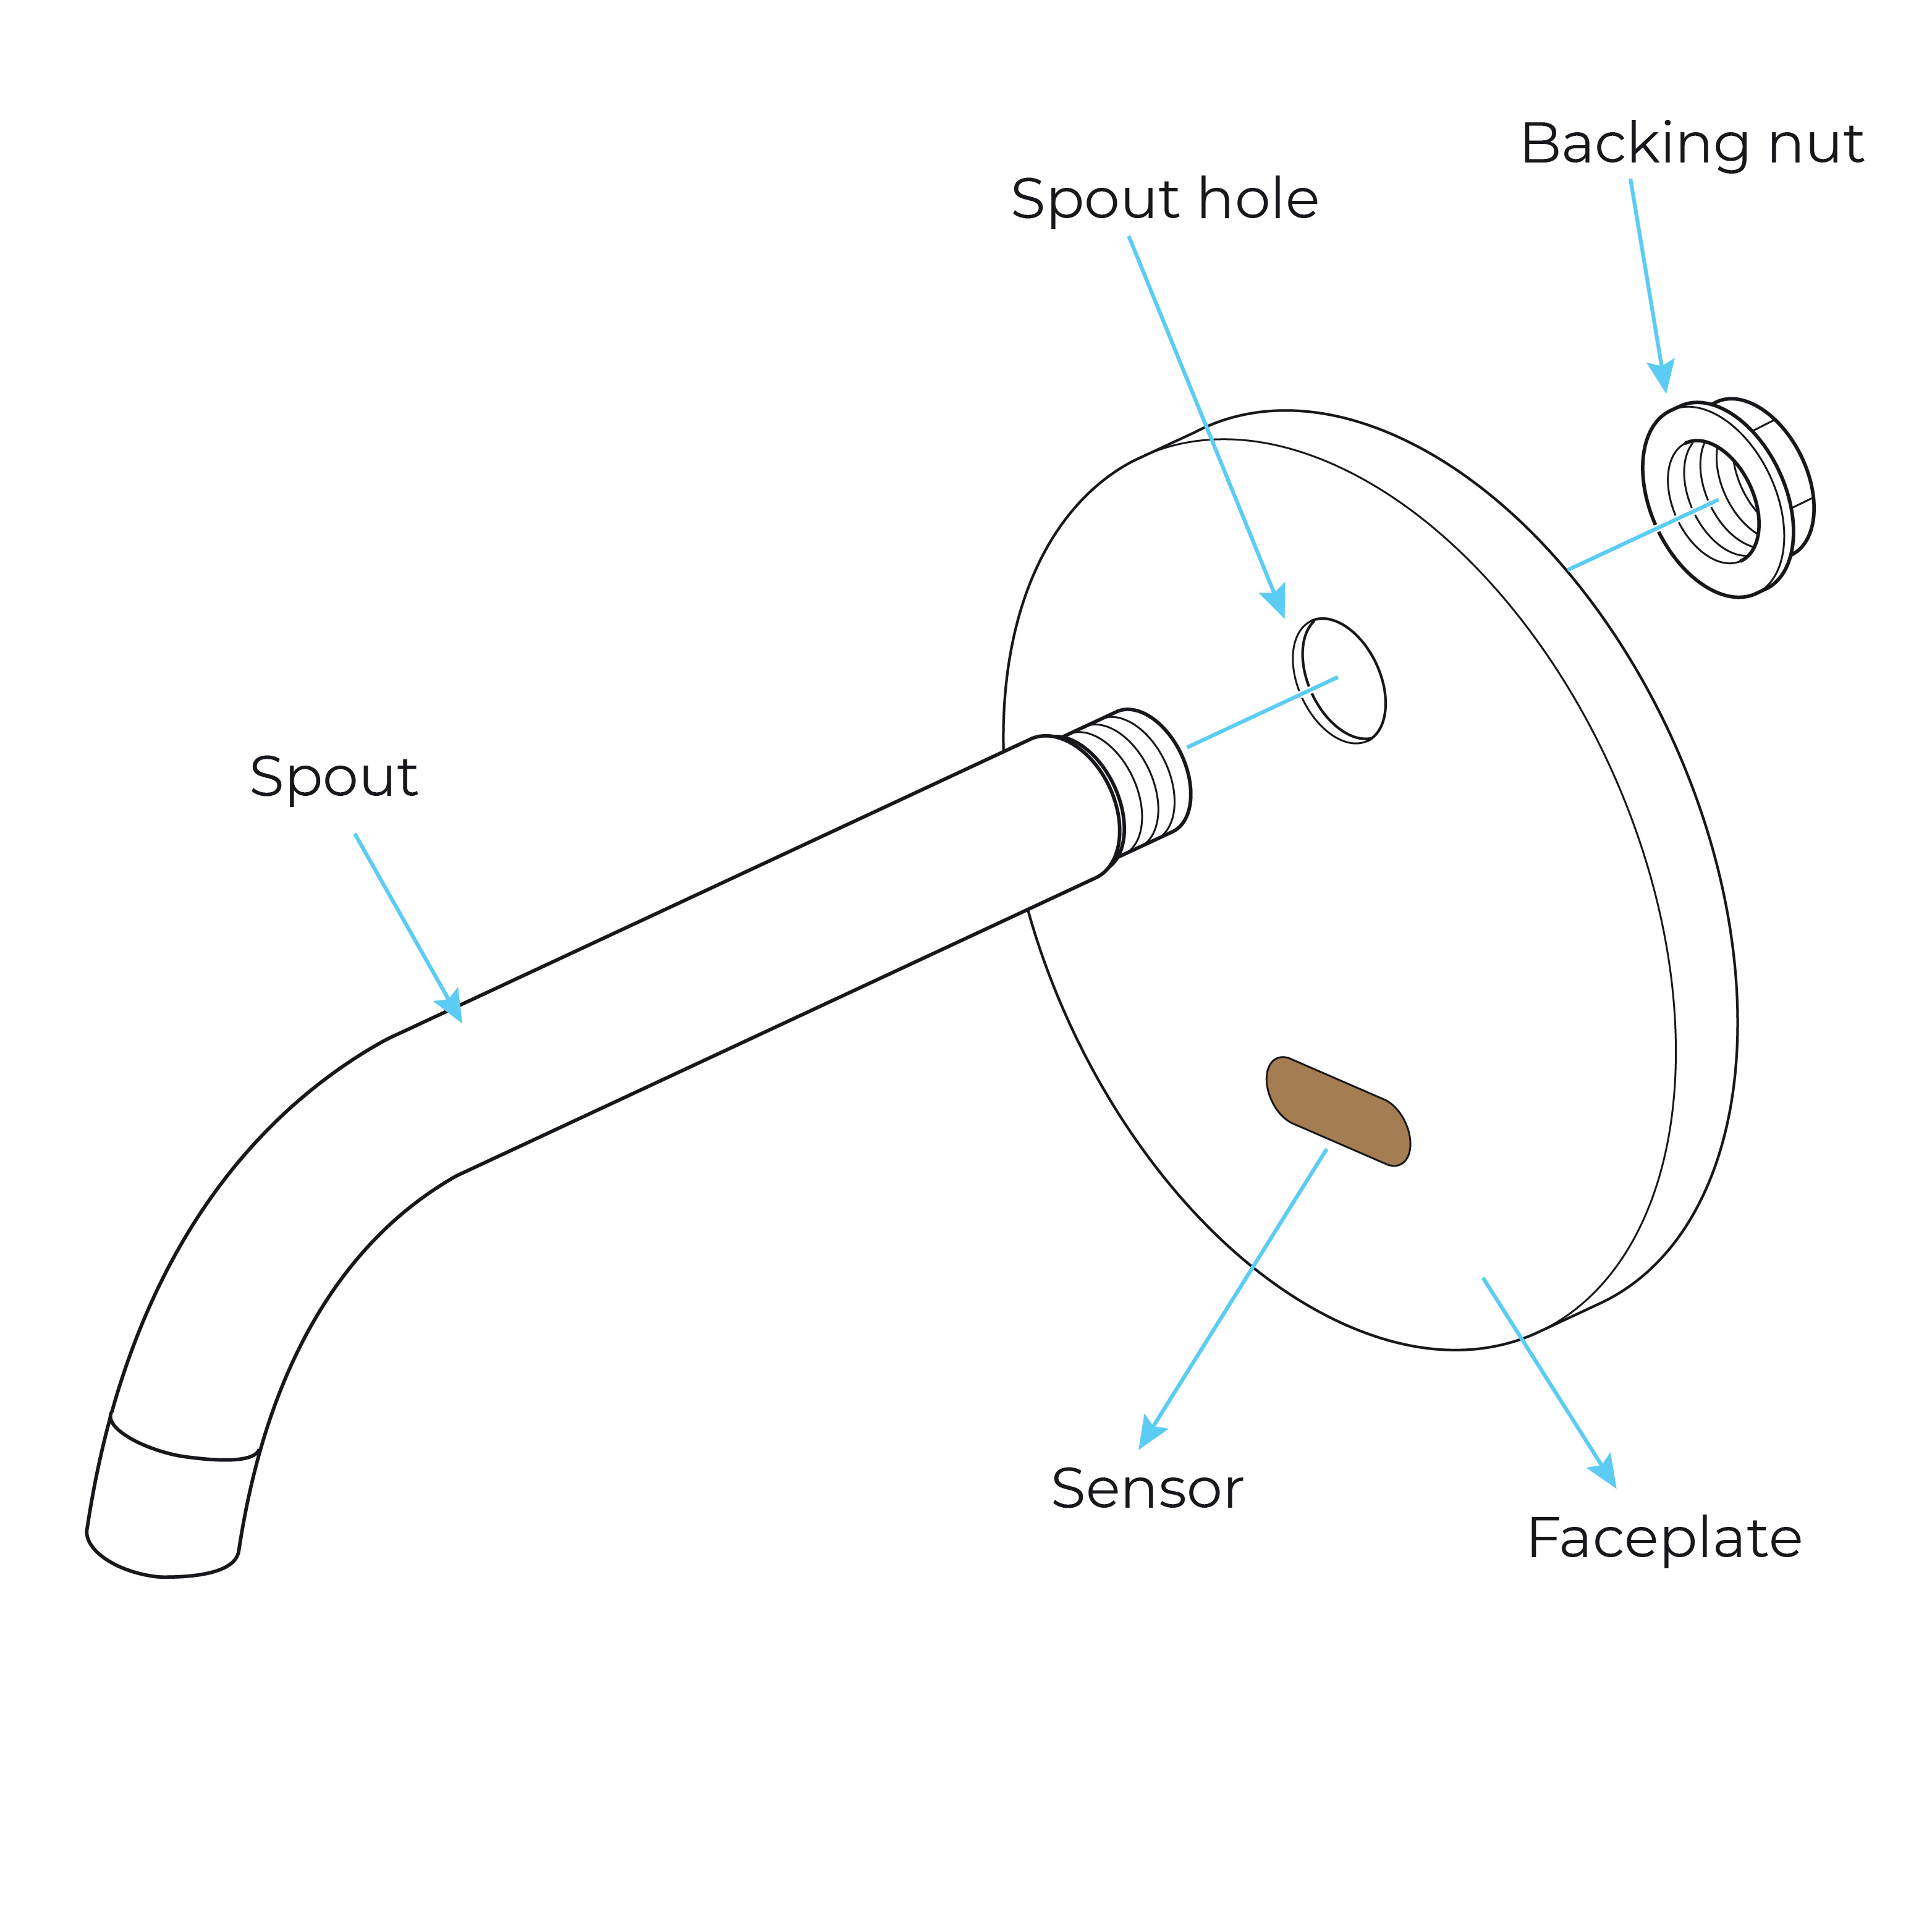
Faceplate and Spout
Remove the back connector from the spout. Push the connector through the hole in the faceplate and screw into the spout. Secure in position with the two fixing screws.
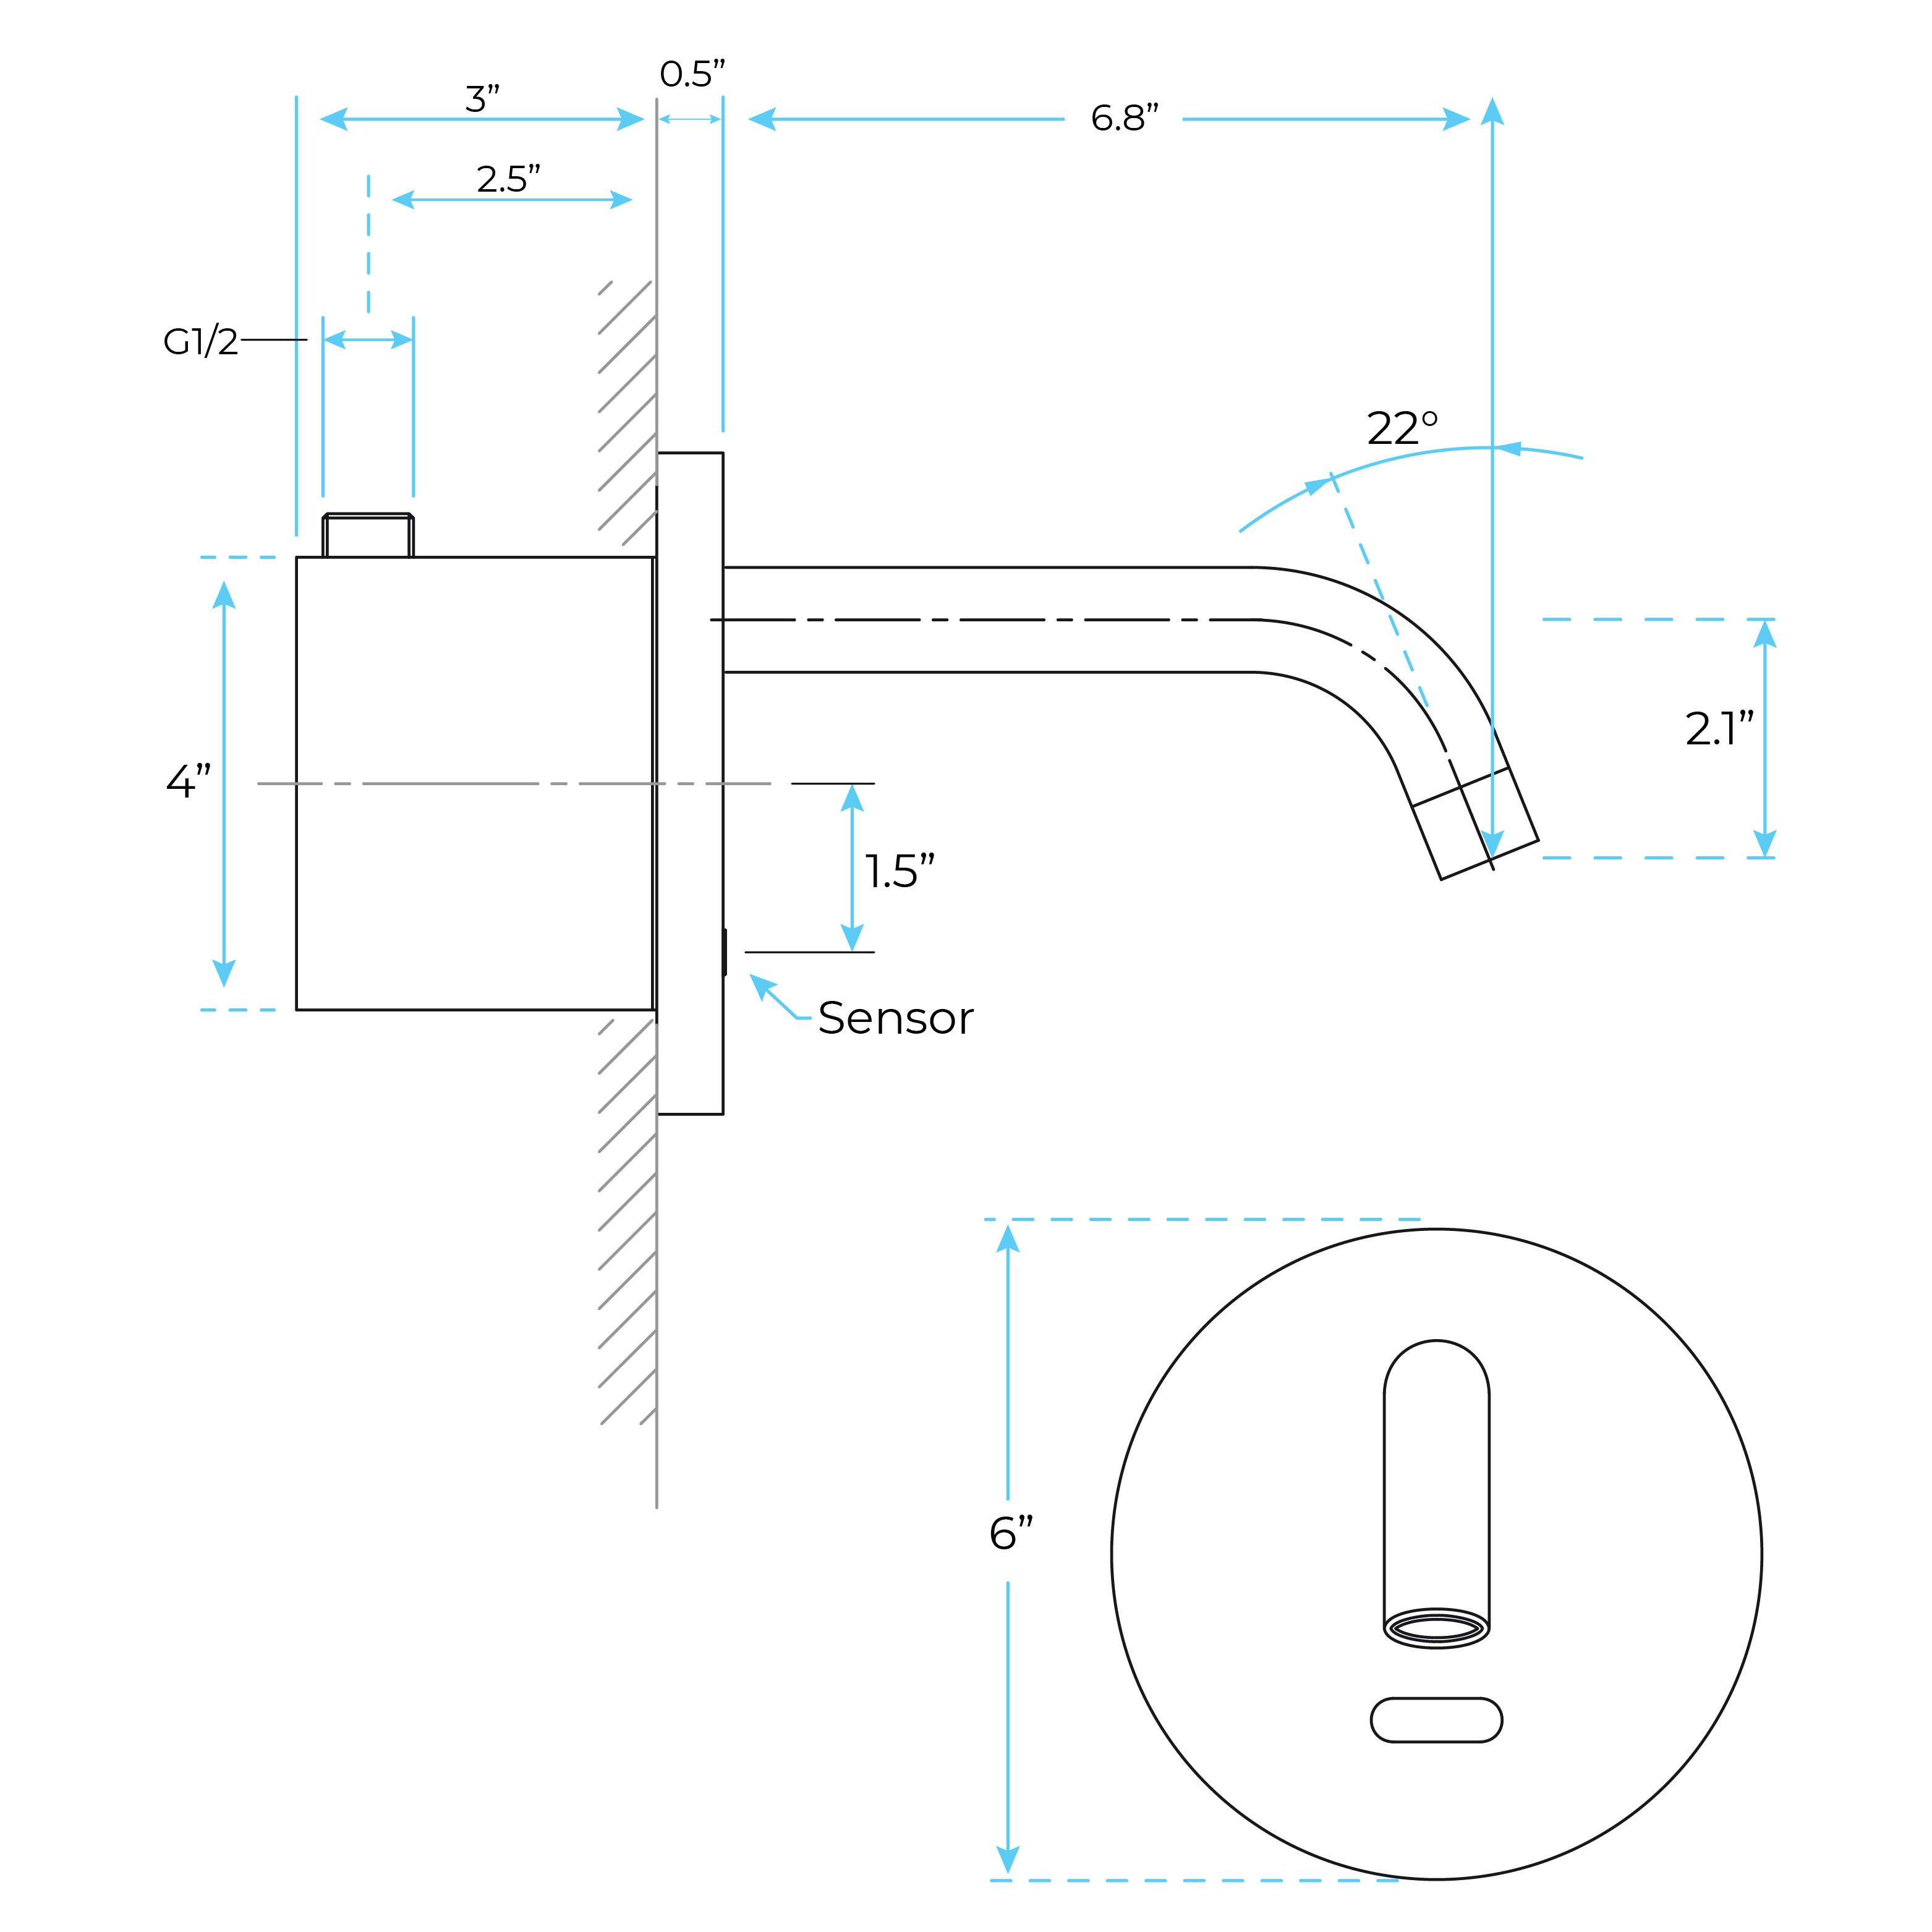
Make sure that the spout hole is in the 12 oclock position and the spout is pointing downwards.
Note: Please do not install this product opposite or near any reflective surfaces as this may lead to false or permanent activation.
Before installing your new mixer, flush through the pipework to ensure removal of debris, turn off the water supply.
The valve must be set into the wall to depth of 80 mm.
If you are fitting the valve to a partition wall or a wall of particularly soft substrate you will need specialist fixings.
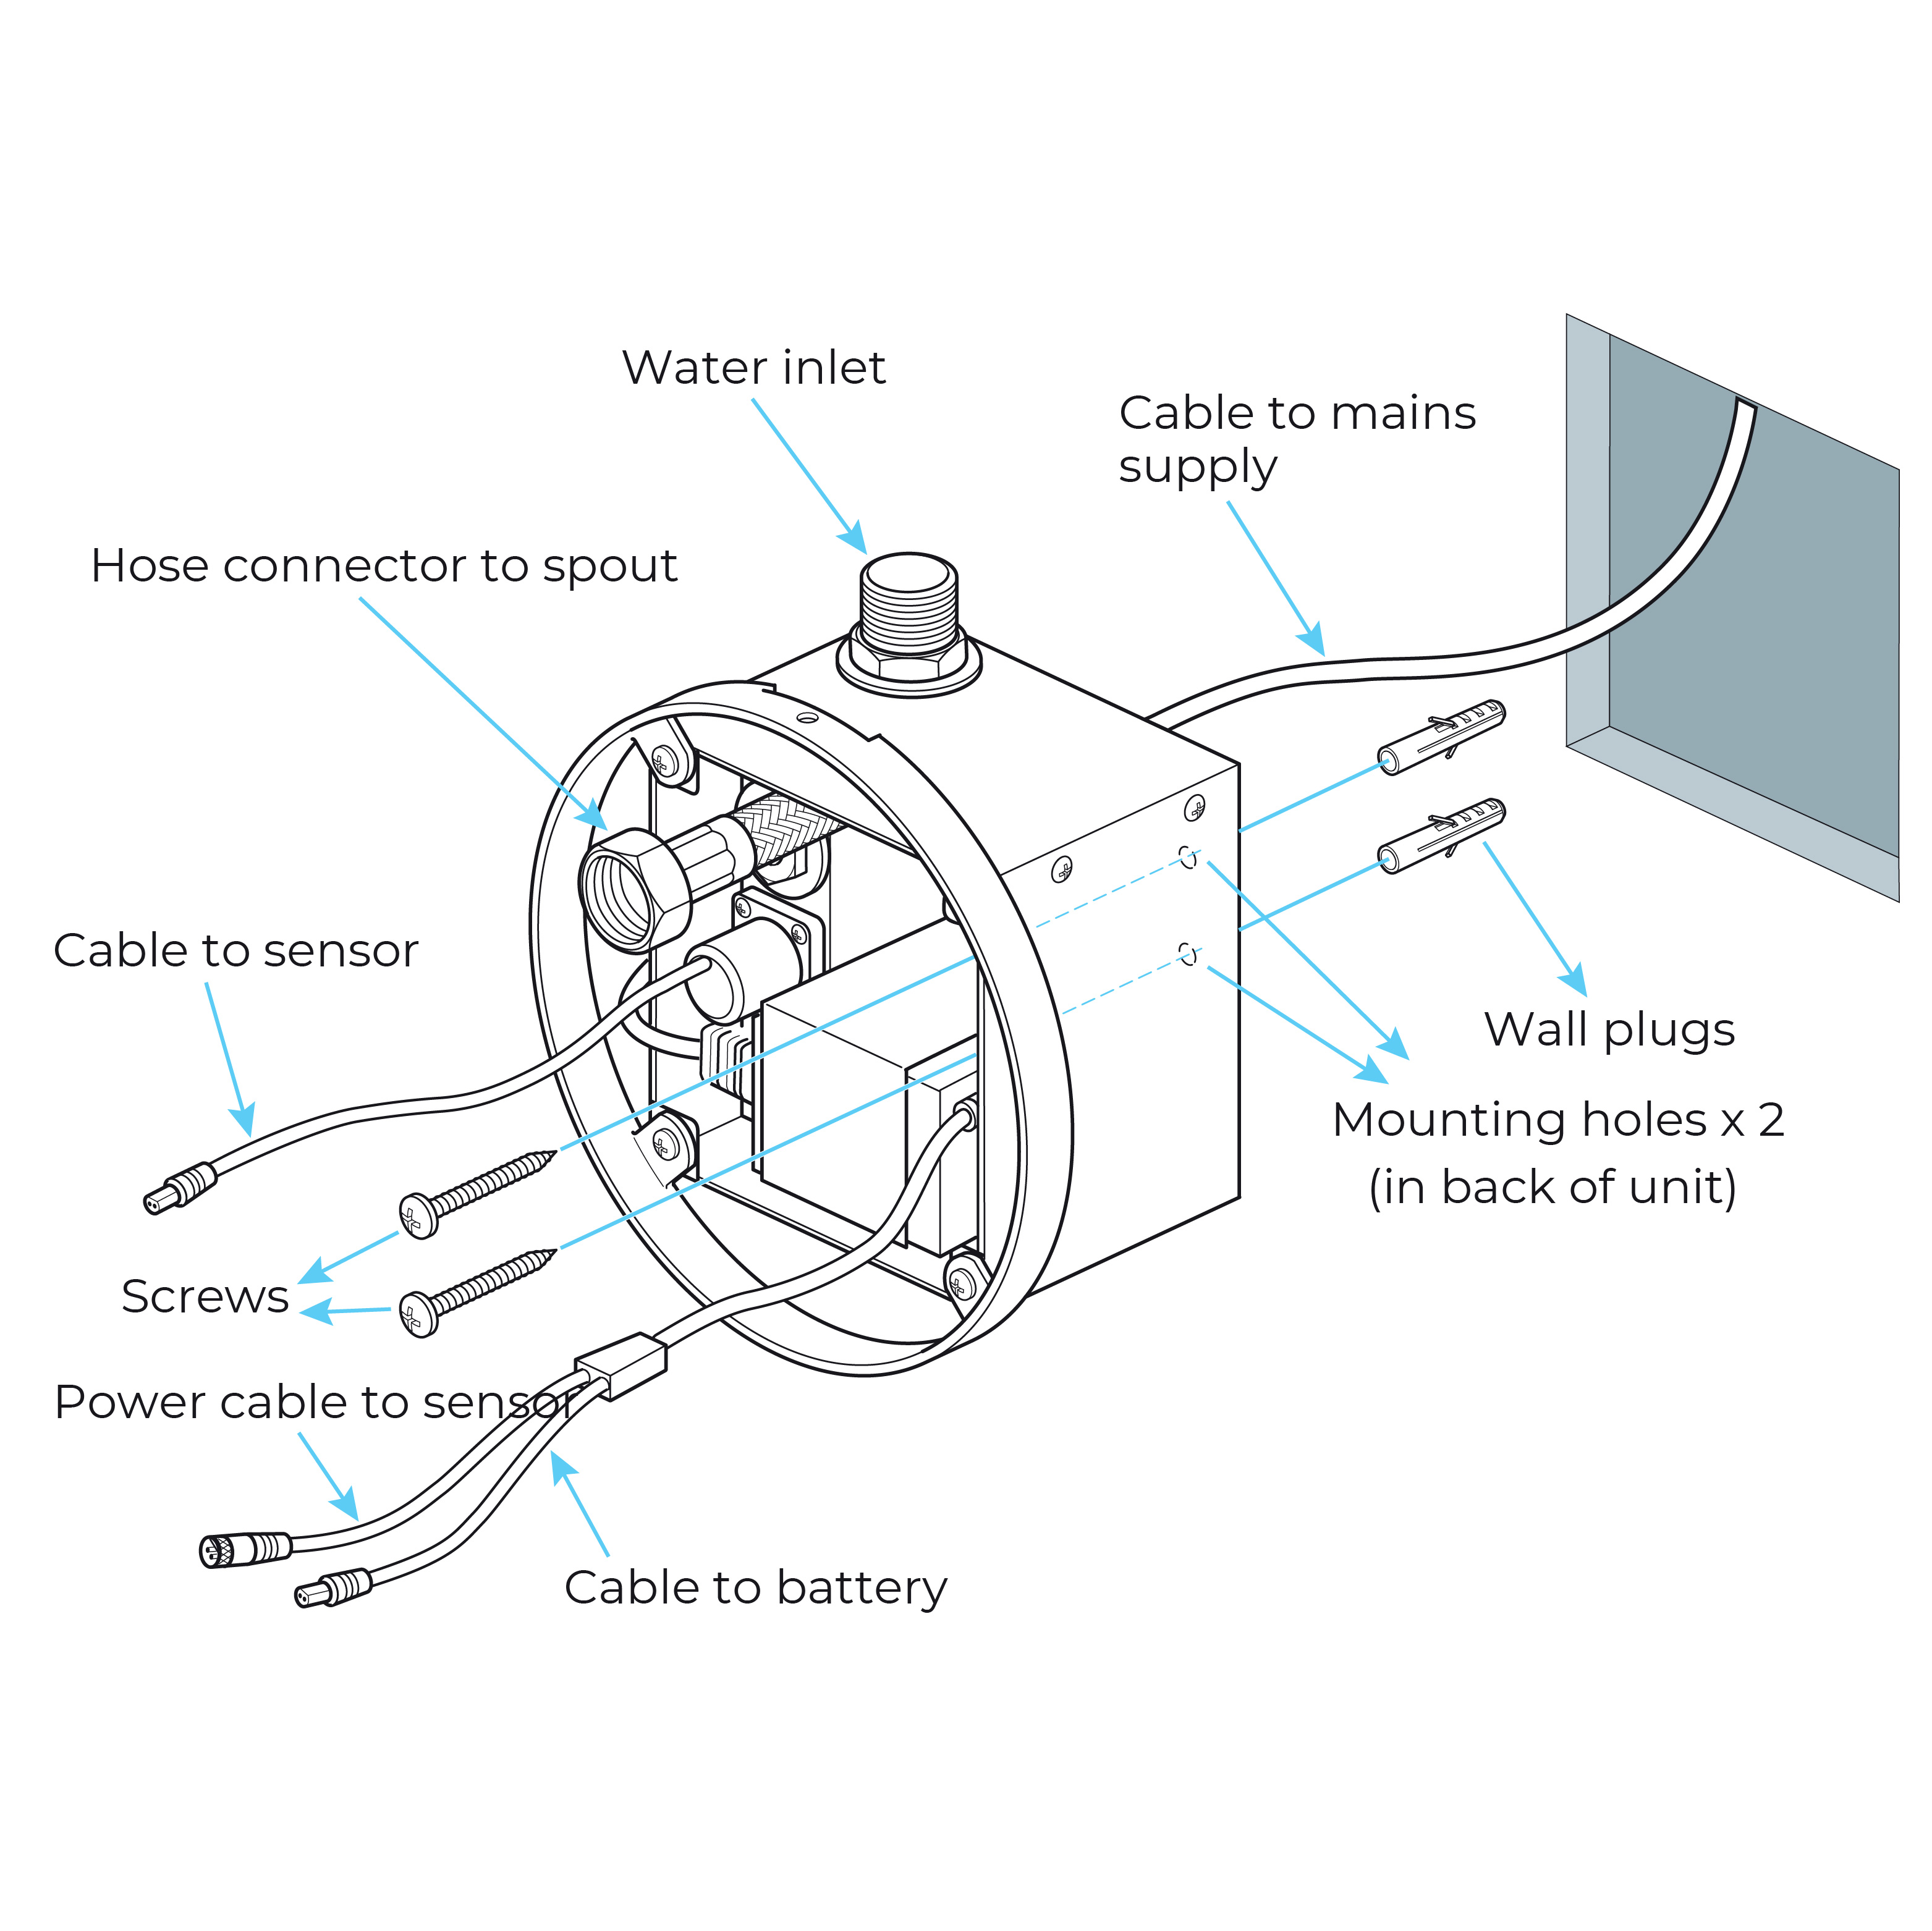
Select the position for the valve and offer the shower valve to the wall, mark the fixing points with a suitable pencil, there are 2 pre-drilled holes in the back of the unit.
Remove the valve from the wall, drill the holes to a suitable depth for the wall plugs and secure with suitable screws
Connect the flexible hose coming from the unit onto the spout, making sure that the rubber washer is in place.
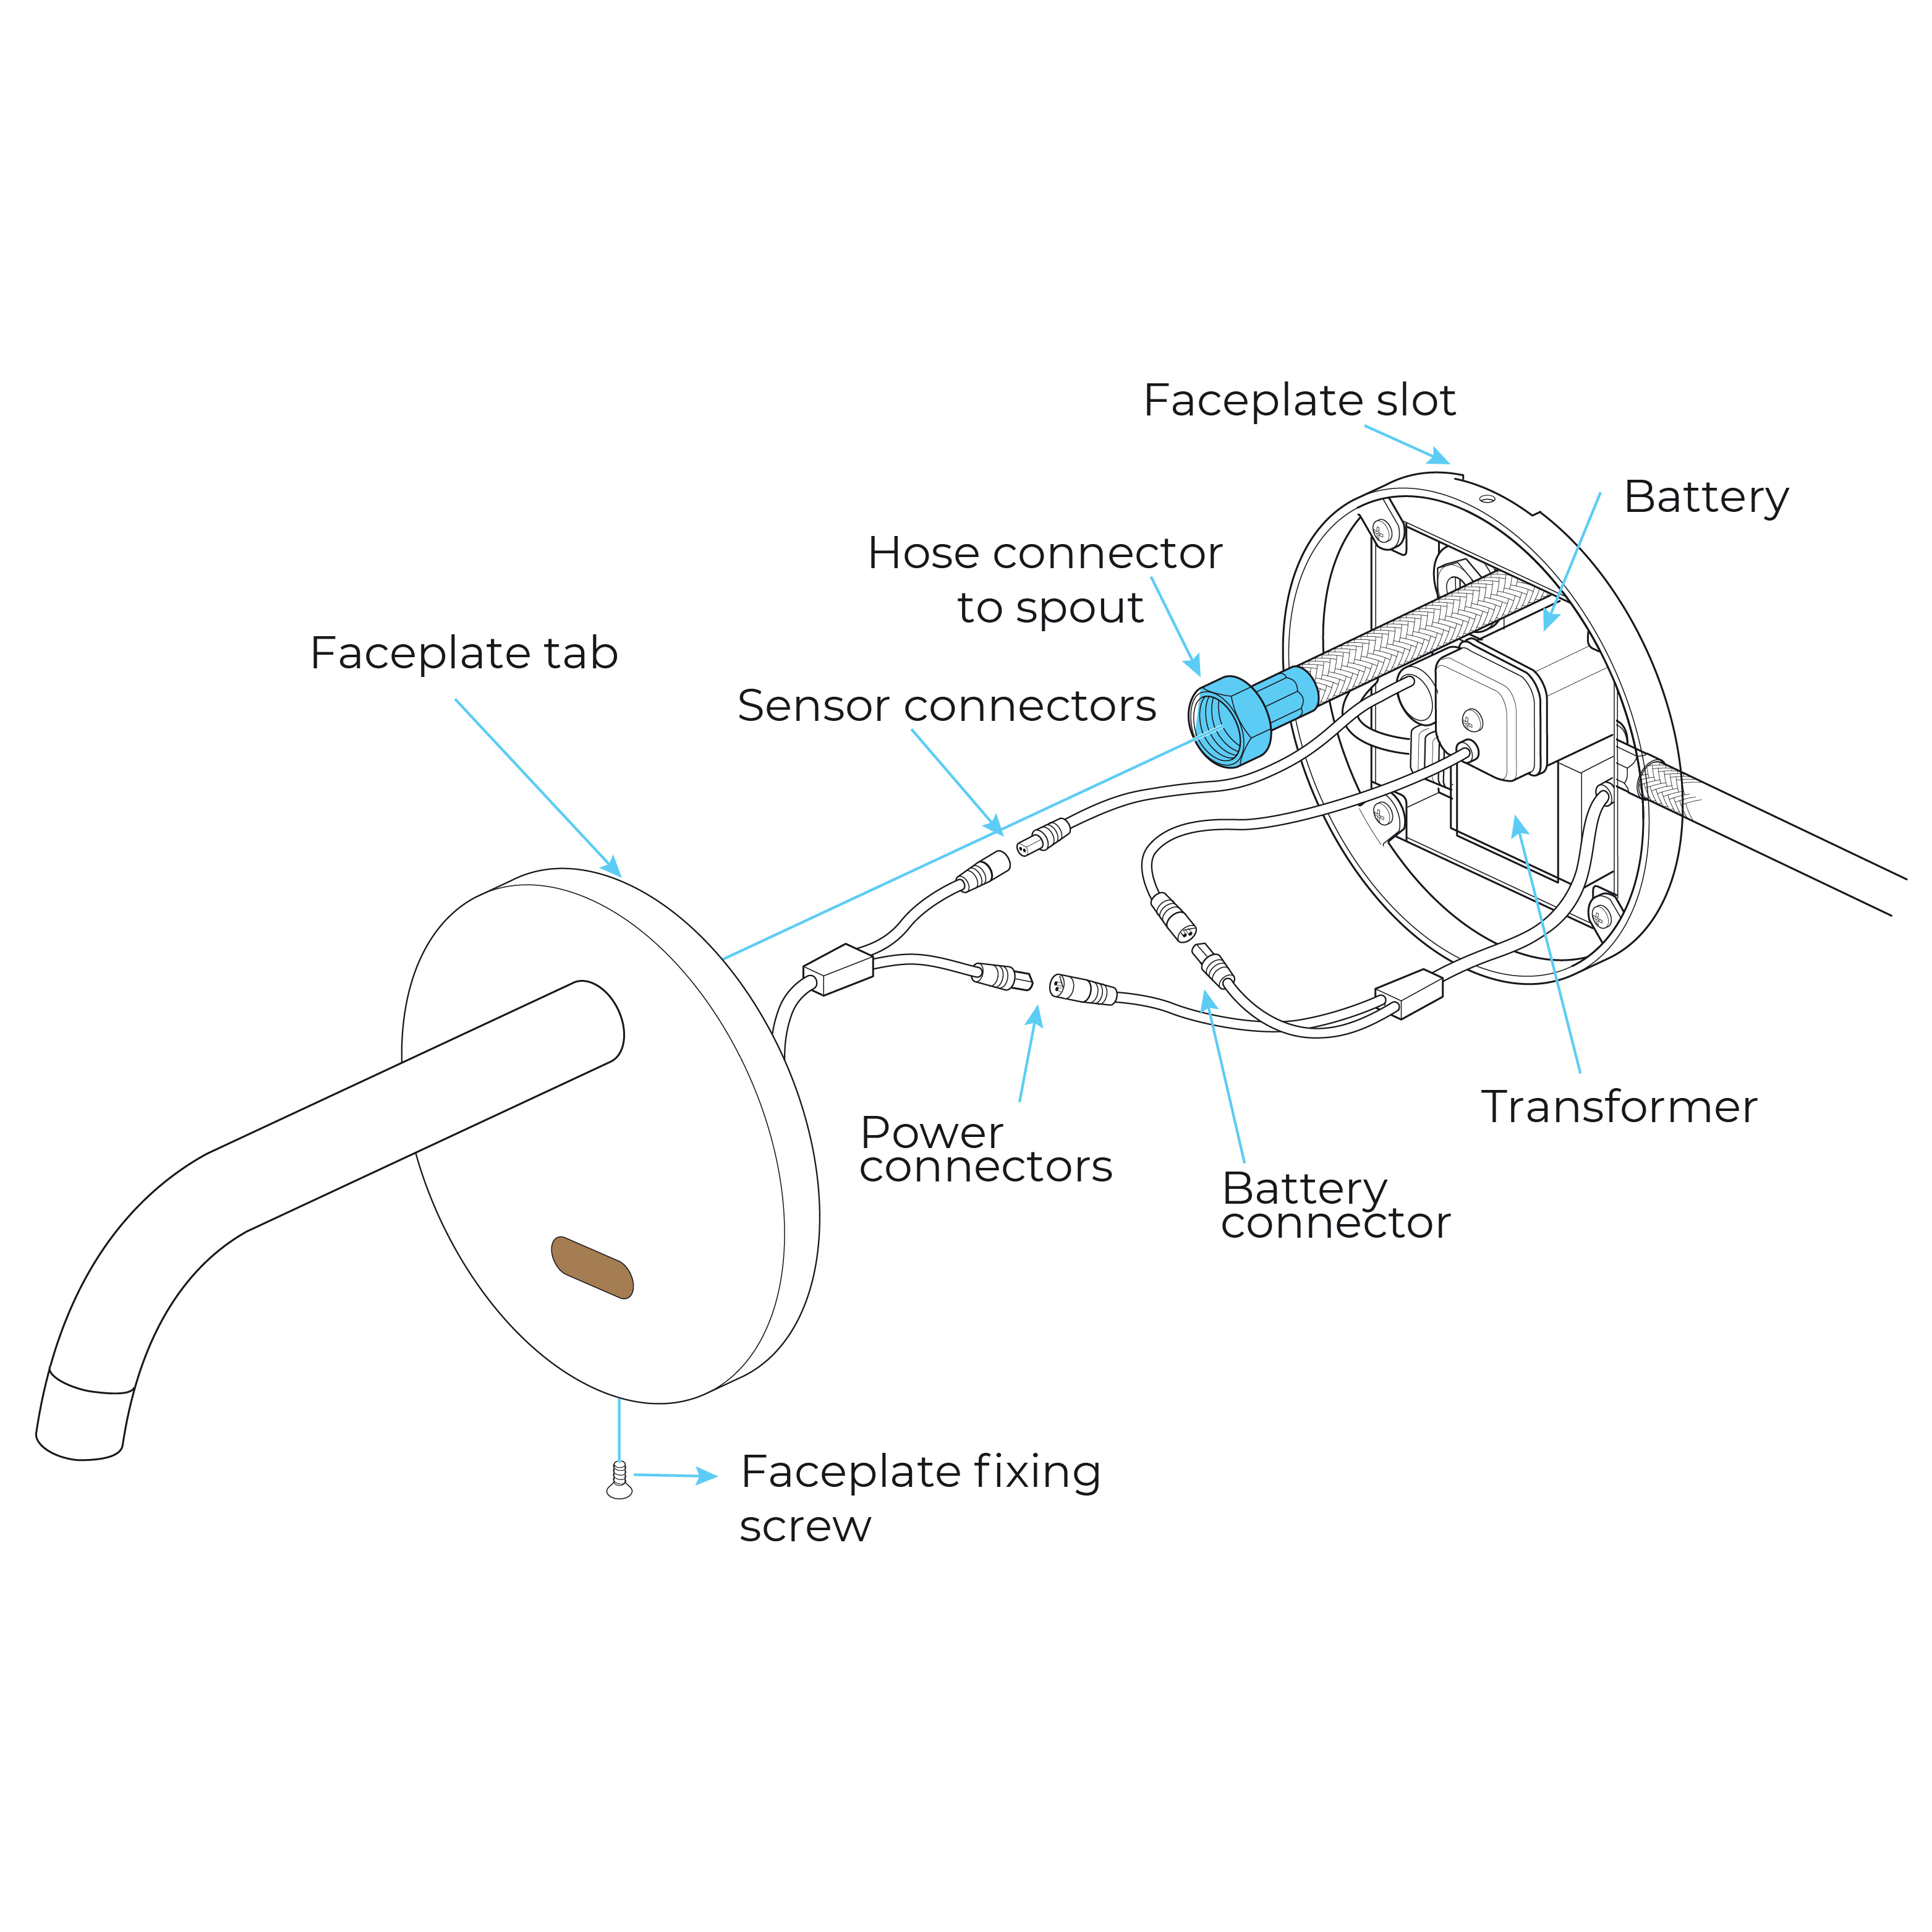
Sensor connections
Connect the plug coming from the valve unit to the socket coming from the sensor.
Power connections
Connect the socket coming from the transformer to the plug coming from the sensor.
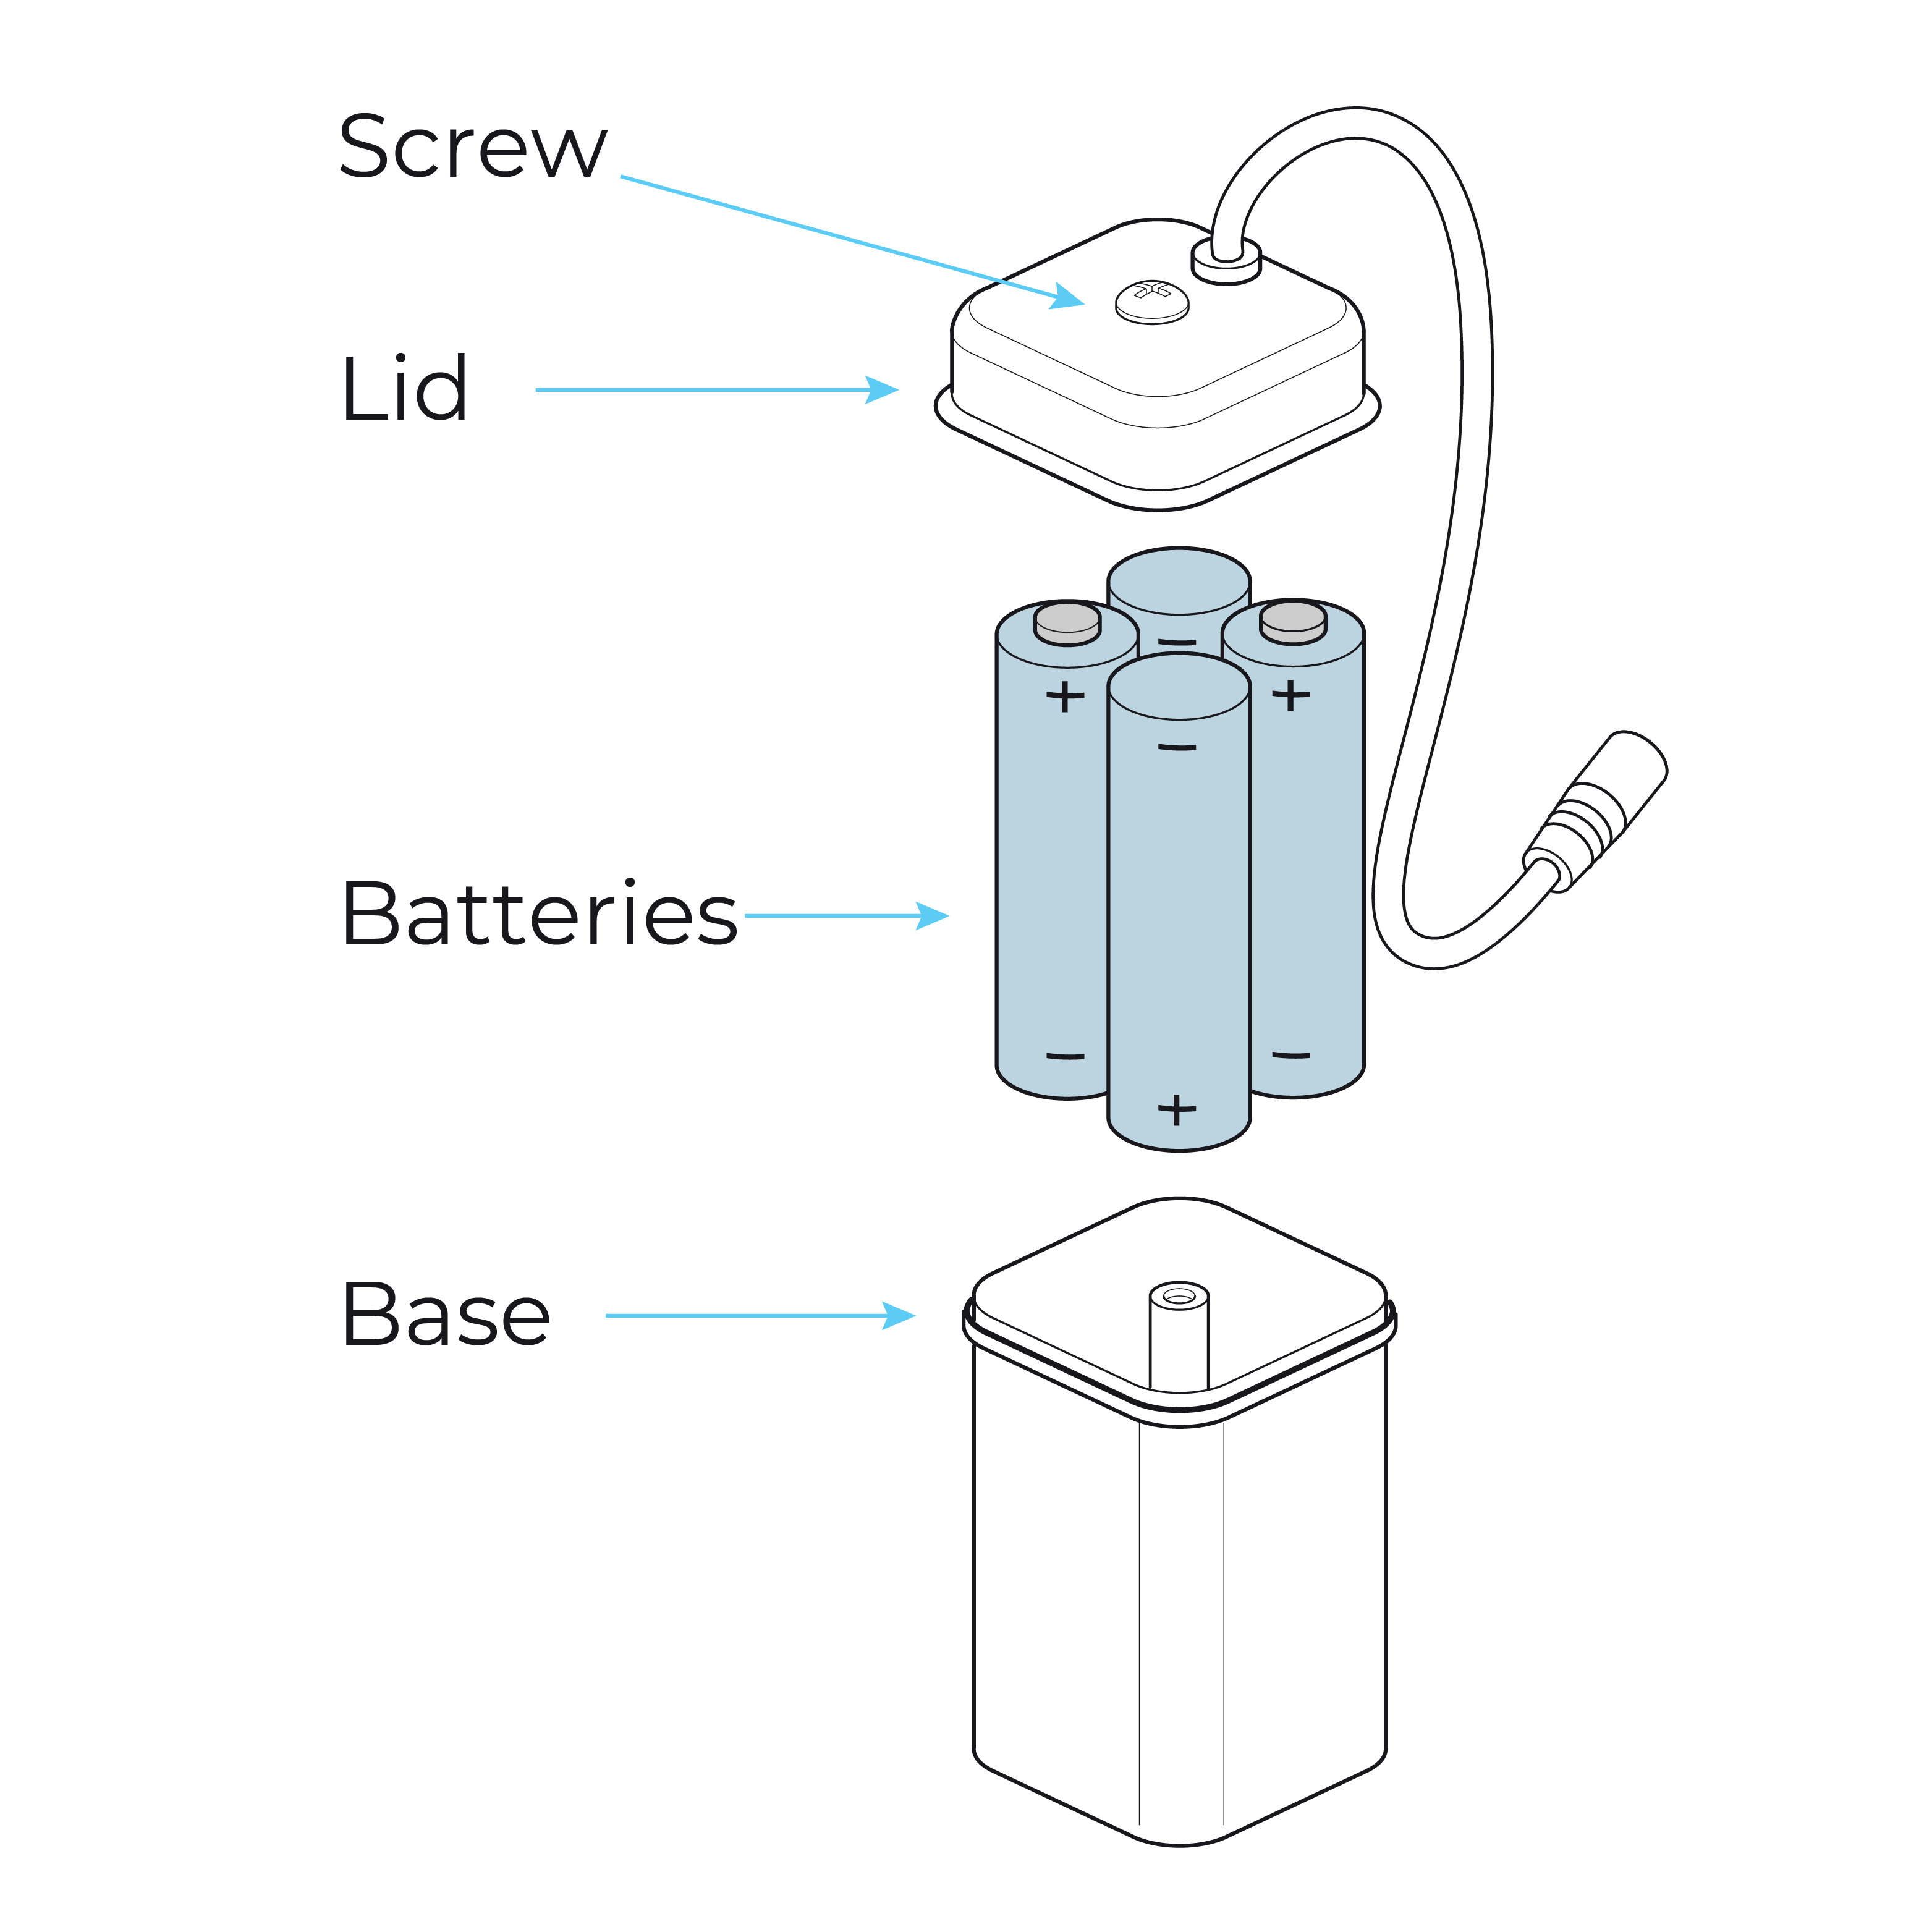
Battery connections
Undo the screw on the top and remove the lid. Insert the 4 batteries into the base, according to the diagram in the bottom of the base. Replace the lid making sure that the 2 springs are orientated to match the negative ends of the 2 batteries (right).
Connect the plug coming from the transformer to the socket coming from the battery.
Slide the two tabs in the top of the faceplate over the faceplate lip, and secure in position with the screw on the underside.
Please ensure that enough access is left for the screw to be removed/inserted, during any routine maintenance.
Turn on the water.
| |  |
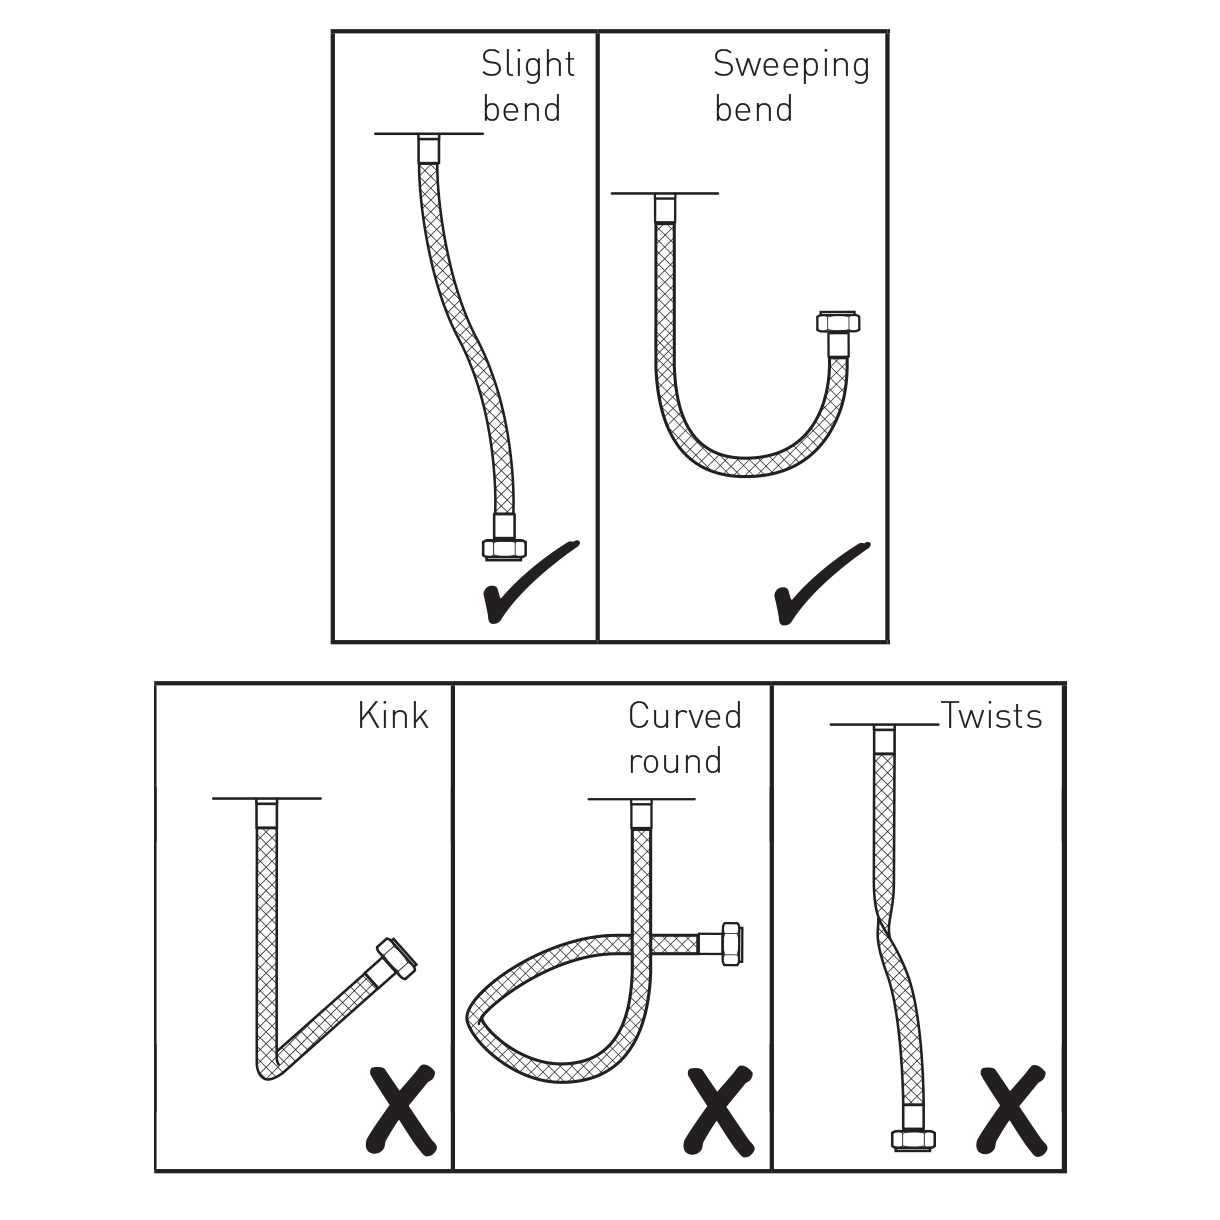
Flexible Connecting Hose
Care must be taken when connecting the flexible connection hose from the power supply box to the spout to ensure it does not bend sharply and kink or twist.
See above for recommended ways to fit the flexible connecting hose.
Important: Failure to follow these guidelines may result in poor performance and damage to the flexible connection hose. | |
 |
|
|
|
|
|
|
|
|
|
|
|
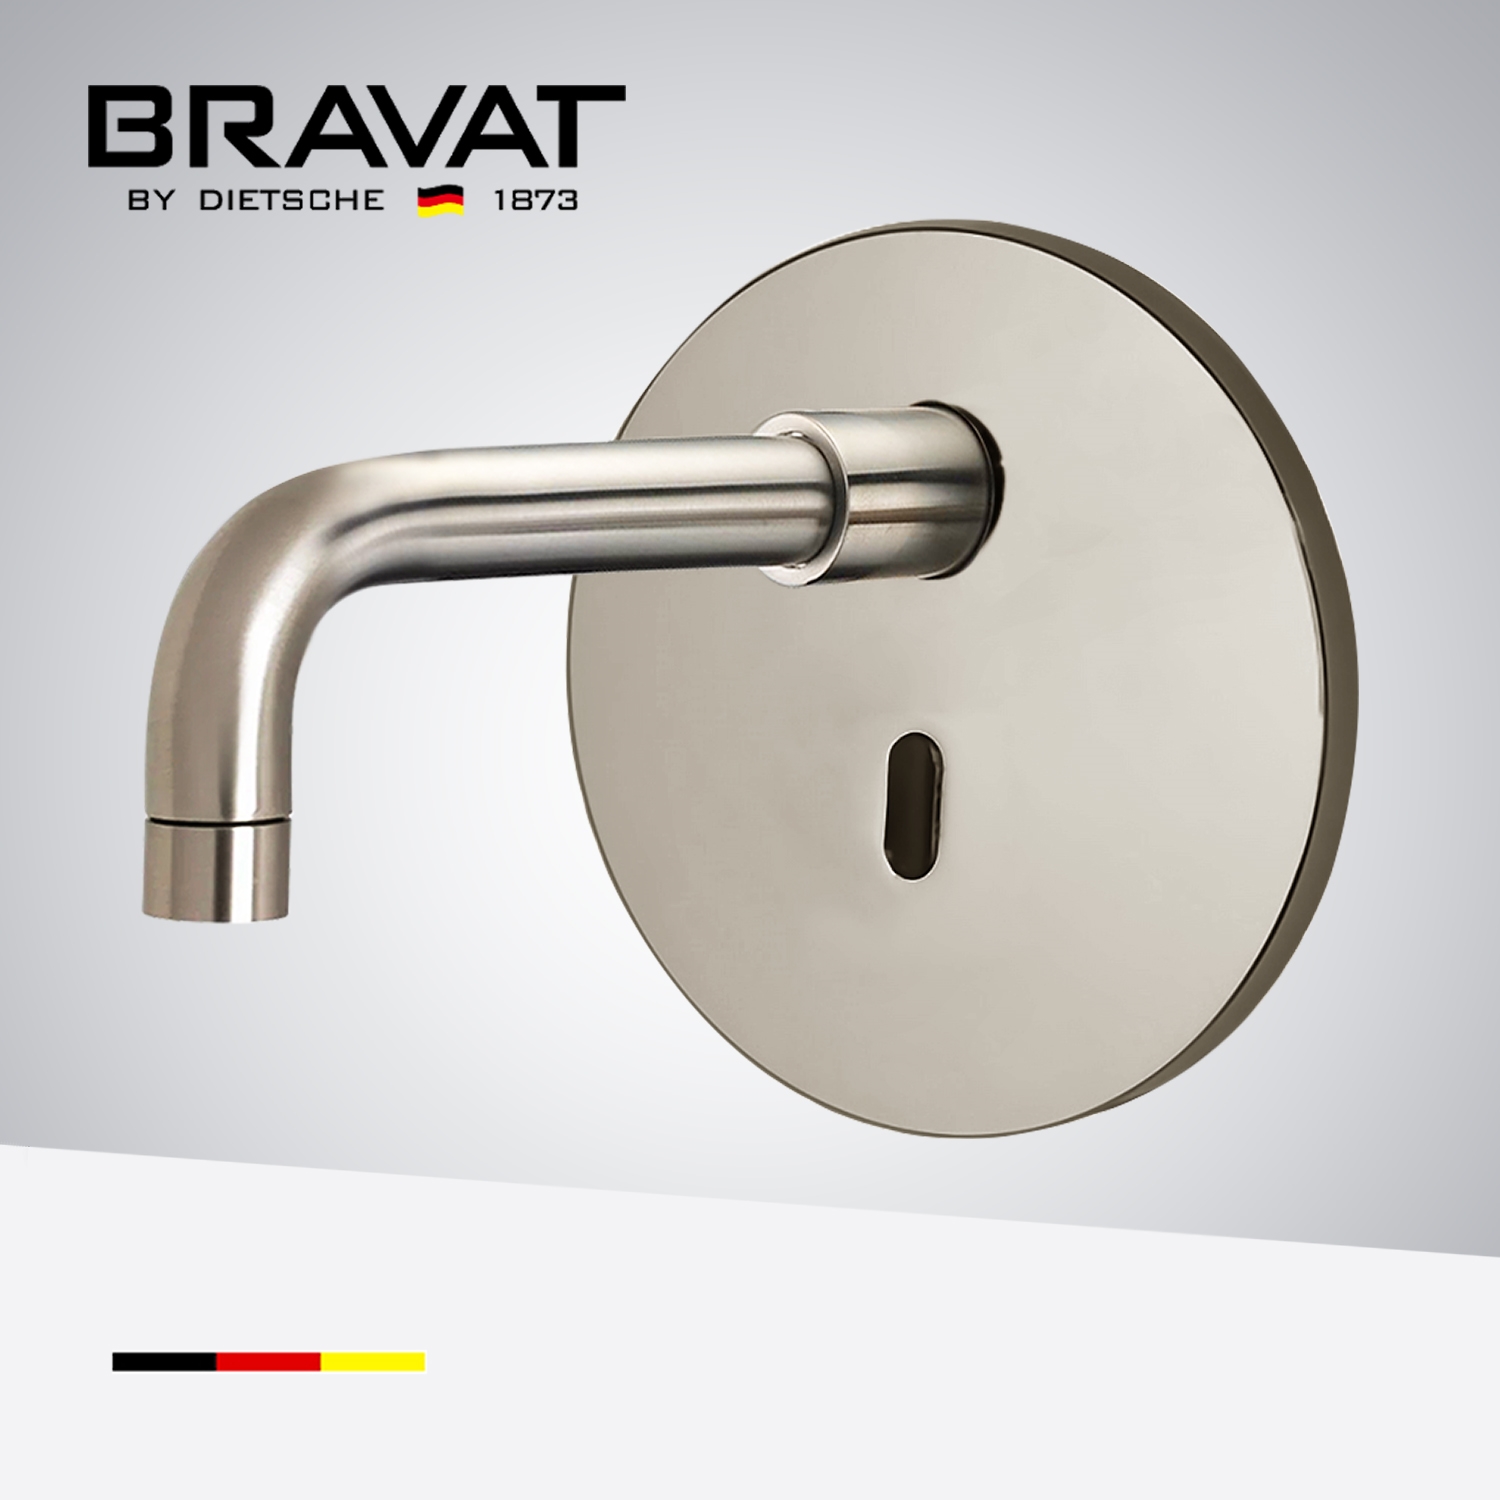
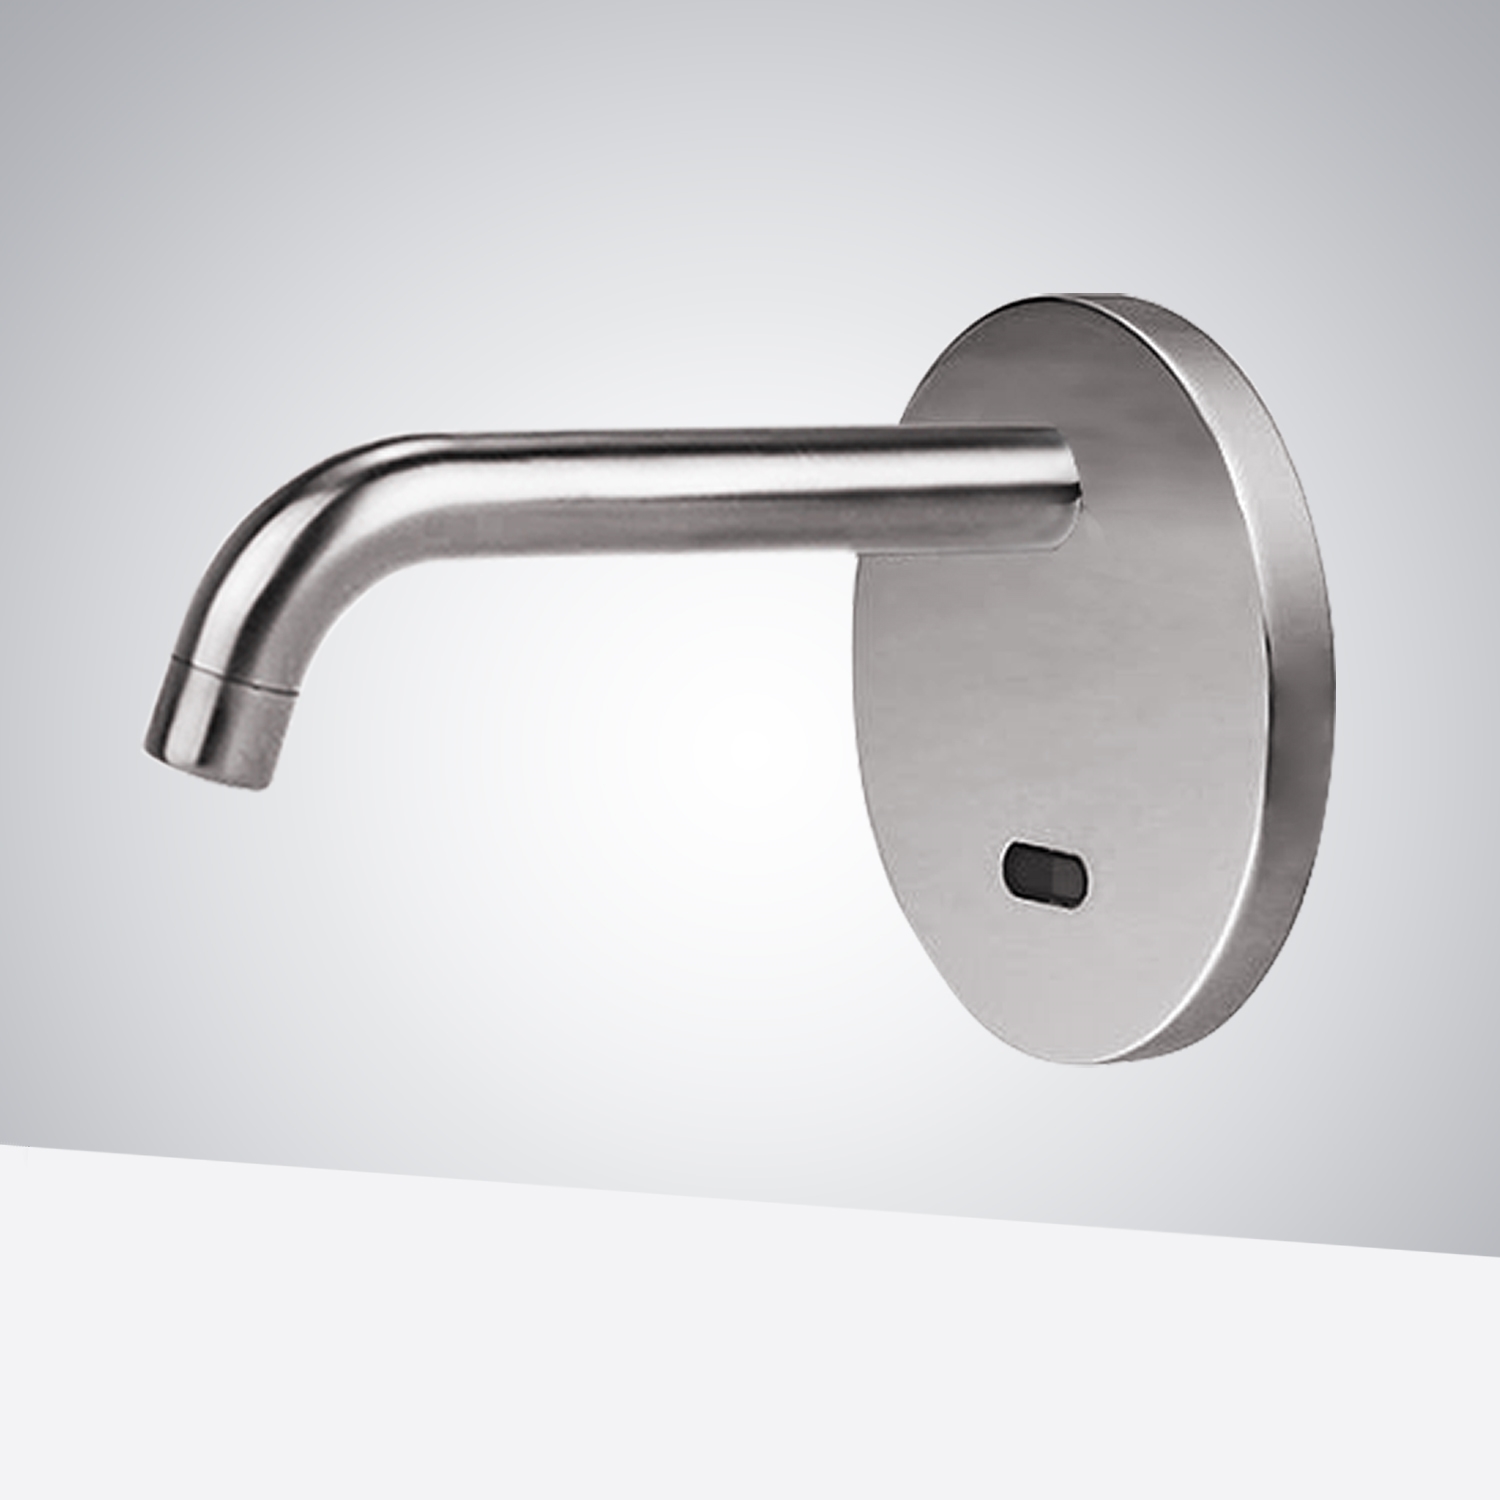
Fontana Brushed Nickel Wall Mount Commercial Automatic Sensor Faucet With Insight Infrared Technology
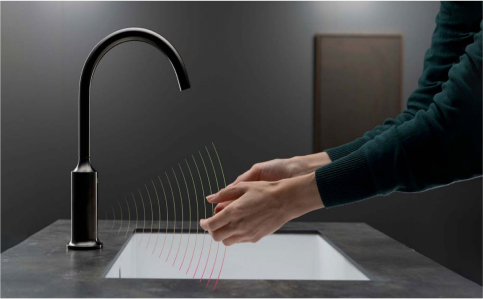
Minimize waste of water, by using this automatic wall mount Nickel faucet . The Sensor Faucet, an electronically controlled faucets that eliminate the need to touch or turn handles. Insight technology calibrates the sensor to filter false triggers and optimize the faucet's operation. Through the use of sensor beams the automatic faucet determines when an object is in front of it and automatically turns on the faucet. Since there is nothing to touch and nothing to reach for, an automatic faucet eliminates all of that cleaning and disinfecting that you do to try to maintain a hygienic surface. Brushed Nickel bathroom sensor faucets are anti-erosion, anti-abrasion and high strength. This is trim set only. It requires valve kit to complete the faucet. Safe Drinking Water Act (SDWA- Low Lead) compliant. On demand on and off. Valve kit is factory set to 30 second max. Continual run cycle if it is turned on continuously.
|
|

|
Features:
|
Visit Product Page |
|
- Brand Name: Fontana
- Model Number: FS1091-BN
- Type: Motion Sensor Sink Faucet
- Finish: Brushed Nickel
- Faucet Applications: Residential & Commercial
- Auto Shutoff: 30-second (can be adjusted)
- Water Flow Rate: 0.5 gal/min (1.9 l/min)
- Aerator: Vandal-resistant aerator.
- Spout Reach: 9" (229 mm)
- Material: Brass construction
- Usage: Commercial / Residential
- Ideal for commercial use applications in public restrooms, restaurants, office building, public facilities, hospitals. Fits all standard US plumbing.
- Technology: Valve kit has electronic Insight Sensor Technology for accurate and consistent activation.
- This trim set can be used with 11830-NA (Hybrid power) wall mount valve or 11843-NA (AC Power) wall mount valve.
- Installation: Single-hole spout mounting. Please consider appropriate distance between spout and sensor.
- Below the counter valve for easy installation and maintenance.
|
|
|
|
|